6-Foot Circle Drill
Fundamentals FUN for golfers of all skill levels
This Element of Practice requires a 15-foot diameter circle of constant slope — either 2% or 4% grade. If you create a 6-foot Putt Circle Element of Practice, then you can also create the 3-foot putting circle exercise.
• PGA TOUR Pros make 64% of their 6-foot putts, while 20+ handicap amateurs make 45%.
• A 6-foot putt is a very common leave from chips and long (lag) putts.
Game Set-up:
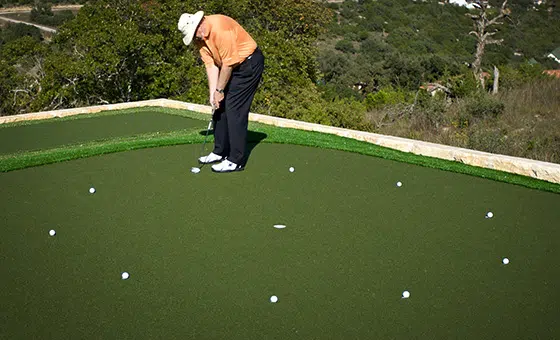
Repeat the Elements of Practice #1 set-up (3-foot Circle Drill), except at a 6-foot distance from the hole (mid-range putts). Start by determining the fall-line of the slope around the hole, mark the straight up and downhill directions from the cup first, and then use a tape measure and stickers to create the rest of the 12 positions around the hole (see photo). Just like the 3-foot circle drill, mark the fall-line putts with two stickers (at the 6-foot radius). Place balls at 12 positions around the hole, starting with the fall-line position below the hole. Then move around the hole in a counter-clockwise direction.

“Almost every golfer I know could improve simply by remembering this one rule: All putts are speed putts.”
~ Dave Pelz Putting Bible
Now Putt:
Start at the fall-line ball below the hole, and try each of the putts until you make it (this means retrieve each ball that misses and putt it again until you make it). As you move around the hole, holing each putt in succession, you will learn how much break you must play for each putt. Don't get hung up on making any specific number of putts in a row. This drill involves completing the circle by making all 12 putts. If you have time, go around the circle again, and hole each putt again. Always move around the 6-foot circle in a counter-clockwise direction for right-handed putters (left-handers move in clockwise direction). This drill will help you with those testy 6-foot knee knockers. Practice these at home and you will be more prepared for them on the course.

Video Instruction by Dave Pelz:

